In a perfect world, I would live in Austin. Its like being in an artistic mecca but still in living in Texas. I love going to Austin and checking out the craft stores. I recently found this article through Vickie Howell. She is an expert on Knitting and Crocheting. She is one of my craft heroes (possible weekly post???) Anyway, She found an article about Austin and I want to share.
If you want more information on the Austin Craft Community, Check out The Austin Craft Mafia. They have listings to websites owned by all my favorite crafty people. Enjoy!

Thursday, May 17, 2012

Tuesday, May 15, 2012
Party Planning
Kiera's 5th birthday is at the end of the month. May 29th. So, planning has been well underway despite her choice of them. She chose the movie "Puss in Boots." It seemed like an odd request but when she kept saying it over and over again, I decided she was serious and to go with it. Until, I realized after looking at party supply stores, there is no pre-made decorations of any kind in the stores. So, I start scouring the internet. Now, if you have seen the movie, you know that Jack in the Beanstalk is a reoccurring theme in the movie. So I started searching and found these websites:
1. Piggy Bank Parties
 2. A pinterest board on Jack and The beanstalk
3. HP has a hole section on Printable Puss and Boots Material
1. Piggy Bank Parties

3. HP has a hole section on Printable Puss and Boots Material
I think from these I can come up with some great stuff for the party. Wish me luck. How-to's to come later on what I come up with.
If you have any ideas you would like to contribute, I would love to hear them!!!
Friday, May 11, 2012
Friday's Music of the week.
I am a huge music buff. I was a music major in college (before I realized, what the hell am I doing?), so I have a very eclectic taste in music. So I hear by declare Friday's to be Music of the Week day!!! I will introduce you to bands I have discovered, bands I like, bands I have seen in concert. Just lots of Bands.
This week, I am posing the video for Eisley.
I found Eisley by going through a website I love called a beautiful mess. Elise Larson has some great design ideas but her husband is part of a new band called "Sucre`." Stacy, the lead singer, is part of a family owned and operated band called Eisley. I fell in love with both groups immediately. I will post some sucre video's next week. But they have a great sound and great lyrics. Enjoy.
Thursday, May 10, 2012
Pin of the week: Finger knitting!
For this weeks, Pin of the week. I did some crafts with my daughters that ultimately lead to Elena knitting ALL day. I highly recommend this one. The pin itself is on my pinterest sight but here is a pic of it.
Elena, my 6 year old, is always bugging me about knitting but she is not my most coordinated child. I worry that trying to do actual knitting with backfire on me. Elena does not do well with failure. So I have been looking for alternative ways to teach her. This is brilliant. Its from Flax and Twine.
I sat down with Elena and within minutes she was hand knitting like there was no tomorrow.


Elena picked it up like it was nothing.

Even started teaching her little sister.
So here is how you do it.
To start with all you need is:
1. yarn
1. yarn

Elena
picked pink with silver accent. My girl does loves pink and glitter.
Kiera pick a similar glittery one, but my girl puts a spin on it and
picks teal with Silver.
2. Your Hand

Start by going under the pinkie, over ring finger, under middle and over pointer. It looks like this...

Then turn it around and go under pointer, over middle, under ring and over pinkie. It should look like this.

Do it again... and again, until you have two loops on each finger

Then grab the bottom loop and pull it over the top loop and off your finger.

Do this again

And Again

This is what it will look like after the first pass. Not pretty, but wait, it gets better as you do more

There is what it will start to look like. Pretty cool.

Here is Elena's final scarf. She is soooo proud and has been knitting like crazy. I have created a monster. She got excited at walmart yesterday when she found the bargain bin of yarn.


Here are my crazy girls, messy hair and all, with their scarves.

Needless to say, everyone will be getting scarves as a gift from Elena this year. I think I will teach her how to crochet next.
Monday, May 7, 2012
Senior Gato
We, the Family I mean, have recently been adopted, Yes I said adopted, by a cat that keeps hanging around. We haven't named him, but he is at the front door every morning as we leave to go to school/work. The kids are so cute, "Hi Cat!" So, I think we will feed him and if he chooses, he can be our outside cat. He is very friendly, and sweet. Here is the new addition to the fam damily. :)


The picture was taken outside with no flash, so I did the best I could, but he is cute!
Cat Eyes Tutorial
I have been doing my eyeliner like this for a while now and it can be intimidating. So, in my daily routine, I took pictures and am now sharing how I do it.
First, you have two options, start completely bare on the lids and only have liner on the eye, or add shadow first. In my experience, if you do the shadow after you do the eye liner, it gets on the liner and you have to do touch ups. Its a pain.
For this tutorial, I went with the bare lid.
1. Start with the liner tip at the outer edge of your eye and sweep it upward. You can go up as far as you like. Do the same to the other side making sure they are even.


4. Fill in the triangle.

This is what the finished product looks like. Hope you like my tutorial. Please share! Please pin!!!


First, you have two options, start completely bare on the lids and only have liner on the eye, or add shadow first. In my experience, if you do the shadow after you do the eye liner, it gets on the liner and you have to do touch ups. Its a pain.
For this tutorial, I went with the bare lid.
1. Start with the liner tip at the outer edge of your eye and sweep it upward. You can go up as far as you like. Do the same to the other side making sure they are even.

2. Next line your eye as close to the lash line as possible.

3. Next, starting near the inner corner of your eye, draw a line to the initial line. Ultimately making a triangle. Check again that both eyes are even.
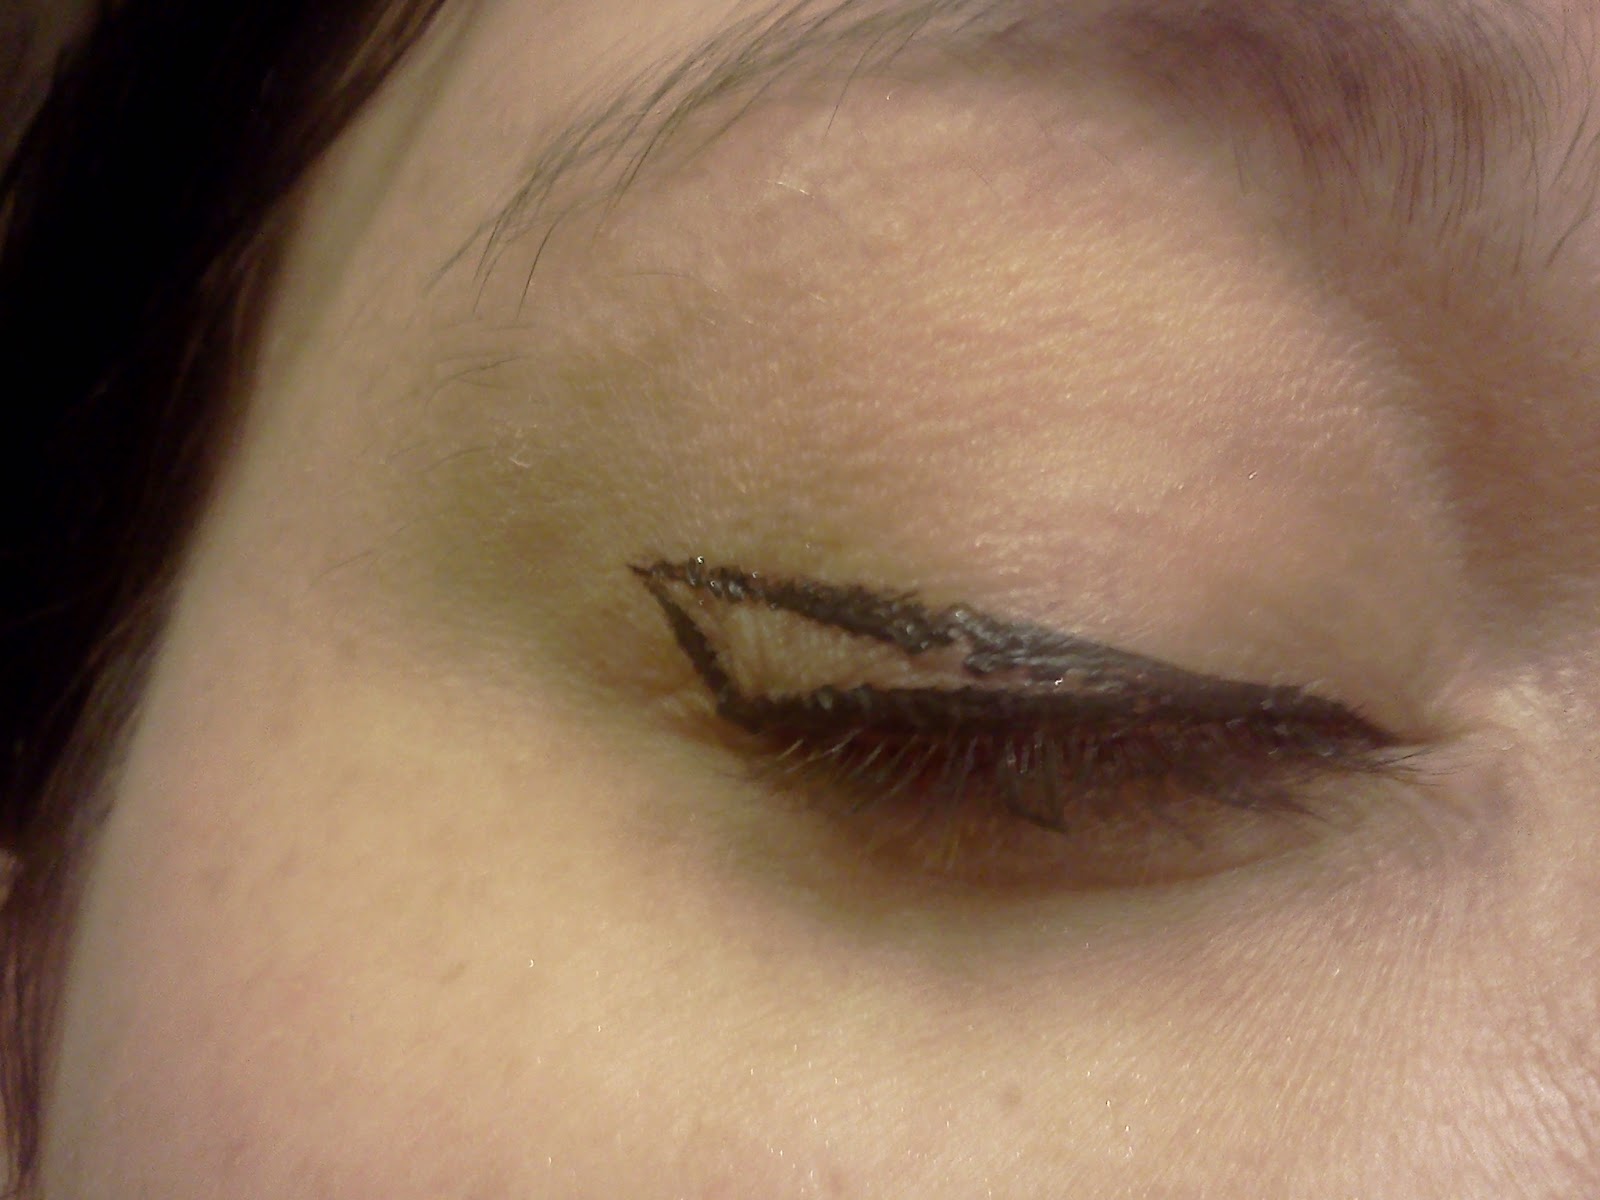
4. Fill in the triangle.

5. Check again that they are even. I have done this enough in my life that I can pretty much do it in my sleep, however, q-tips are an amazing invention that you can use to clean up the line.
This is what the finished product looks like. Hope you like my tutorial. Please share! Please pin!!!


Its kind of hard to see the detailed flip at the ends of my eye, but I like the way this looks.
Be sure to pin!
Friday, May 4, 2012
Pin of the week
I probably pin about... ok, I pin alot, I really couldn't tell you how many I pin and repin. so I thought that could be a great weekly post. so I here by declare saturdays, pin of the week day! I will post some pictures (with my new tripod!) of a pin I used to make something cool and we just see what happens, good or bad, hopefully more of the former! So, at home with all four of the kids, and I am going to attempt to make something, wish me luck!
Subscribe to:
Posts (Atom)