Showing posts with label Handmade. Show all posts

Monday, June 18, 2012

DIY Magnetic Makeup Organizer

I decided it was time to clean up my makeup. I am not much of a girlie girl, but I have to wear makeup. Getting older, have imperfection, got to cover them. But my makeup usually is just a mess and a hodgepodge of junk. Probably not the best way to store my makeup. I went from this...


To this!

Now mind you, I didn't attach magnets to the brushes and a few others, but that is in a container neatly on my vanity. I will figure out what to do with that later.

Anyway, You will need a cookie sheet (Dollar store), magnets (Dollar Store), Mod podge, Glitter, scrapbook paper (or you can do what I did and print out a great pattern off the internet!), sponge brushes, and scissors, and ribbon (not pictured)

and of course, a hot glue gun. No project is complete, till you have burned off any remnants of your finger prints with hot glue!
This is my trusty, very old, very worn hot glue gun that I, sort of, stole from my mom. She will probably see this and go, I was wondering where this went!! Hi MOM!!!

So, I had multiple sheets of paper to cover this, as the cookie sheet is bigger than your standard 8.5 x 11 paper. Using my exacto knife and scissors, I sized the paper, in the tray, and cut it to fit.


This is the part where the kids get involved. My girls love helping me do projects, especially when glitter is involved. So Mod Podge is harmless, so they helped me spread it onto the cutting board.


Then I placed the paper on top, making sure it didn't have air bubbles. 


Then I added glitter to the Mod Podge. 


And applied to the entire thing, even the lip that is outside the paper. Yes, it was a big mess but was it worth it, YES!!

So once its all covered and glitterized, let it dry for about 30 minutes. You can be working on the other side of the project and it should be done by then. 

Next, Get your glue gun ready and your makeup. Using the magnets from the dollar store. Hot glue them to the back of the compacts. Oh, and I had to learn the hard way that you need to pay attention to which side of the magnets neet to be attached to the makeup. I had a few that I had to redo because the magnets wouldn't work on one side. 


Once the tray is dry, flip it over and measure the ribbon so that it goes from the bottom all the way to the top with lots of extra so you can tie the two pieces together and make a bow. I did the ribbon all the way up the tray with hot glue to make sure it had plenty to hold onto and would be sturdy enough to hold up the weight. 

Then, tie a bow at the top and hang. Once hung, add your makeup! 

Voila! Makeup Organized! Nailed it!

Hope you like the tutorial. It looks great in my bathroom and my hubby is just glad there is not makeup all over the sink in the bathroom!


you are talking too much
DIY Club
Tip Junkie handmade projects


I Gotta Try That

PWW Button

http://www.thethriftyhome.com
The Shabby Nest

Monday, May 28, 2012

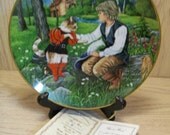
Kiera's 5th birthday party, Puss in Boots theme!
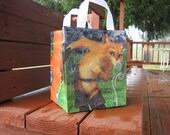
Kiera's 5th birthday!
Puss in Boots Theme!

We had a wonderful time at Kiera's party. The theme came together quite well, I have to say. I think I have probably doomed myself, just because now I have to keep it up and do all the cutesy stuff at all the parties from now on. But it was really fun putting it together and I am sure I will do more next birthday (there are four children, I should have plenty of practice by the time I am done with kiddie birthdays, if I will ever truly be done). 

 So the decorations I did were a beanstalk (If you haven't seen puss in boots, Jack and the beanstalk is the main idea behind the movie, so I ran with that.) The bean stalk was made out of pool noodles and had 3-d paper dolls of Puss, Kittie Soft Paws, and Humpty Dumpty  that I got off an HP website featuring puss in boots. They turned out really good, and they were super easy to make and free (not considering the card stock and ink it took)


Then we had magic beans, of course!!


Then there were the golden goose eggs!! These are left over plastic eggs from easter that I spray painted gold. I used Krylon Metallic in Brilliant Gold. It didn't say plastic on the can, but for three bucks, I was willing to try it. I figured if it didn't work, I can always use it for other projects. Luckily, it sprayed beautifully and once it was dry, did not flake or rub off, which was actually my worst fear. I (or rather my sister) filled the eggs with Hershey's kisses. What is the equivalent of golden goose eggs, CHOCOLATE!!!


The cupcakes I bought from Sam's. They were delicious and inexpensive and I was able to get them in the colors I wanted. The toppers I made myself. Click here for a free printable.

So that is the Decor for the party. But the highlight of the party was really the bouncy house.
We had a bouncy house, made for smaller kids, with a moon walk and slide with ball pit. It was a perfect day. The sun was shining but not so bad that it was extremely hot. The bouncy house package we got through Fiestas Portable Party Packages , came with a canopy, table and 6 chairs. We all went outside a lot to just hang out and watch the funny kids go crazy!!

Bouncy house on one side, ball pit on the other. 

Nevin couldn't be happier and messier. Which was my fault. The kids started saying that the house was getting hot. So I thought, well, this thing came with an optional water hose attachment. Lets hose it down. Needless to say, everyone was wet and dirty but oh so happy. Whatever, I got over the hole dirt thing years ago.

Kiera got lots of gifts that she loved, but her favorite, which was from Mommy and Daddy was her Fluffling. Yes, you read that correctly, a Fluffling. It is basically a trible (if you recall your Star Trek Trivia) that sings, speaks, and cries. Everything noisy you could think of, it does. I know I am going to be sorry I bought it but it made her happy and there is an off button. I like off buttons!!


That is one happy five year old. 

Happy Birthday, Kiera! 
I love you baby!


This post was featured in a link party at:


http://www.thethriftyhome.com
Lil\'Luna